We test and review fitness products based on an independent, multi-point methodology. If you use our links to purchase something, we may earn a commission. Read our disclosures.
Building a DIY weight plate tree is one of the easiest and most effective ways of storing plates in a home gym. This do-it-yourself guide is designed to help you build a weight tree for less than $20 and an hours worth of work. Building a home gym doesn’t mean you have to drop thousands of dollars and this is a perfect example of how you can build the garage gym of your dreams on the cheap.
What is a Weight Plate Tree?

If you have a home gym, it’s likely that you have weight plates. Whether they’re cast iron plates used for powerlifting or bumper plates used for CrossFit or Olympic weightlifting, those plates need a place to be stored. Some people just decide to leave their plates on the floor or up against a wall. This is certainly doable, but in a busy society, time is of the essence and having to flip through plates to find the one you want is tedious.
In addition to being annoying to go through, having plates on some sort of storage rack makes them easier to lift and place on a barbell, prevents excess damage to the plates, and simply looks better than a random mess on the floor. Plate storage options range from weight storage on the back of a power rack to toaster racks with segmented dividers to make taking the plates off the rack easier.
By, and large, however, the most popular style of plate storage rack is the classic weight plate tree. A weight plate tree comes in various sizes and shapes, but they pretty much all have a similar build. A center post. Two to four plate holder pins on opposite sides of the post and sometimes barbell holders and some hooks for lifting belts and barbell collars.
They’re simple, which makes them the perfect thing to make a homemade version of that you can do yourself without a ton of extra tools or expertise. If you have a home gym and would like a way to store your plates, a weight plate tree is your best bet.
Materials
- 1 x 2″ x 4″ x 14′
- Framing stud – $5.581 x 1 1/4″ x 48″
- Dowel – $4.721 x 8 oz.
- Elmer’s Indoor Wood Glue – $2.9721 x #8, 3 in.
- Wood Screws – $4.00
Total Cost for Materials: $17.25
Yes, that’s an entire plate tree for $20. For those without a lot of weight or just getting into building a home gym, this is a smart option.
Tools
- Battery Powered Drill (corded works fine too.)
- 3/32″ Drill Bit for Pilot Holes (You could get away with a bit bigger)
- Tape Measure or Ruler
- 1/4″ Spade Drill Bit
- 6″ Trigger Clamp
- 12″ Miter Box
- Backsaw
Build Instructions
Step 1. Sketch the Design
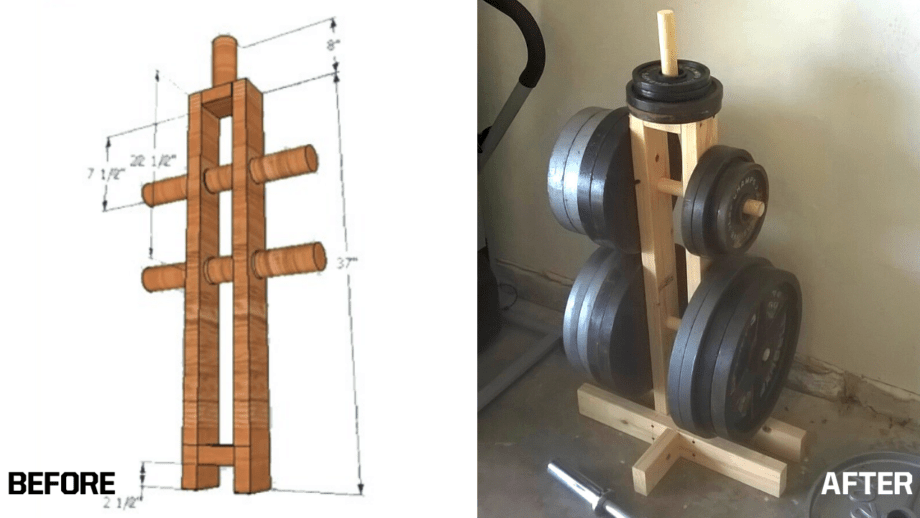
The first step is to building anything is to have a vision of what you want it to look like. I walk around with a notebook all day so I can jot ideas down, and so I drew this before starting:

Step 2. Cut the 2”x4 Lumber and Dowels to Appropriate Sizes

Although you can easily cut these yourself if you have the proper tools, it’s probably easier to just have the hardware store where you buy the lumber do the leg work. If you buy your lumber from Home Depot or Lowes they’ll make cuts free of charge. Here are the cuts:
- 1 1/4″x48″ dowel cut to 18″ and 30″2″x4″x14′ cut to 2 – 37″2 – 24″1 – 12″40″ leftover
These can be adjusted depending on how many plates you want to hold. You could also replace the wooden dowels with black threaded pipe for an even higher weight capacity.
Home Depot only allows a few cuts total, so you may have to cut some yourself, unless you ask really nicely to an associate that isn’t in a hurry (what I always do.)
Step 3. Drill Holes In the Vertical Supports for The Dowels

In order to make the holes even, we suggest clamping the two vertical posts together. Drill the holes in the center of the 3.5” block about ¾” deep and 7.5” from the tops of the 37” vertical upright supports. Next drill a second set of holes 22.5” from the top of the 37” vertical upright supports.
Step 4. Assemble the Top of the Weight Tree (For Change Plates)

Take the 3.5” block and screw the 8” long dowel (you can make it shorter if you prefer) in through the bottom to secure it. You can set this aside for later assembly.
Step 5. Assemble the Base Supports

Mark the center of the (2) 24.5″ pieces where the (2) 6″ pieces will be connected.
Use the bar clamps to hold the 6″ piece to the 24.5” piece and, with a drill bit, drill pilot holes through the 24.5” piece and into the 6” piece. (This is a pretty important step – failure to drill pilot holes may result in splitting the edge of the wood.)
Unclamp, add wood glue to the edge of the 6” pieces, reclamp it to the 24.5″ piece like it was before.Drill (2) 2″ wood screws through pilot holes of the 24.5″ piece and into the 6” piece.
Repeat for the other base support pieces.
Step 6. Assemble Vertical Upright Supports

Place the remaining 3.5” square 2×4 piece between the two 37” pieces. The bottom of the 3.5” piece should be 2.5” from the bottom of the 37” pieces.

Important note: I suggest using a square to make sure the vertical upright supports are straight. This design makes it easy for the plate tree to end up leaning to one side which not only looks bad but could be dangerous. Just trust me on this one.
Clamp these pieces with a bar clamp and drill (2) pilot holes with a drill bit through each 37” piece and into the 3.5″ piece. Unclamp, apply wood glue (definitely suggested although not required) to each contact point, reclamp, and drill wood screws into the pilot holes of the 37″ pieces and into the 3.5” piece. Attach the other 3.5″ square piece with the 8” dowel to the top of these 37″ pieces such that the top of the 3.5″ square is flush with the tops of the 37″ pieces.
Remember to clamp, drill pilot holes, unclamp, add glue, reclamp, and finally screw. The last part of the vertical support assembly is to add the dowels. Tap the 17.5″ dowel through the top holes of the 37″ pieces and the 18.5″ dowel through the bottom holes.
Important note: If the dowels won’t go in the holes you’ll want to use the spade bit to make the holes a bit wider.
The vertical support should now look like this:

Step 7. Attach Vertical Upright Supports to the Already Assembled Base

Center the vertical support assembled in the previous step between the two horizontal base pieces. Clamp and drill (2) pilot holes through each contact point of the base and into the vertical support.
Make sure the structure is level at this point and that it does not rock or move excessively at this point. Unclamp, add glue, reclamp, add screws.
Step 8. Add the Plates, Stand Back, and Admire Your Work

Recommended Alternatives
For many people, having to build a plate tree versus buying one for not much more that will hold more weight and look better (subjective) is a better route. If you’ve decided that you don’t want to build one or want to upgrade from the DIY version you’ve built, here are some recommendations.
Budget Weight Tree
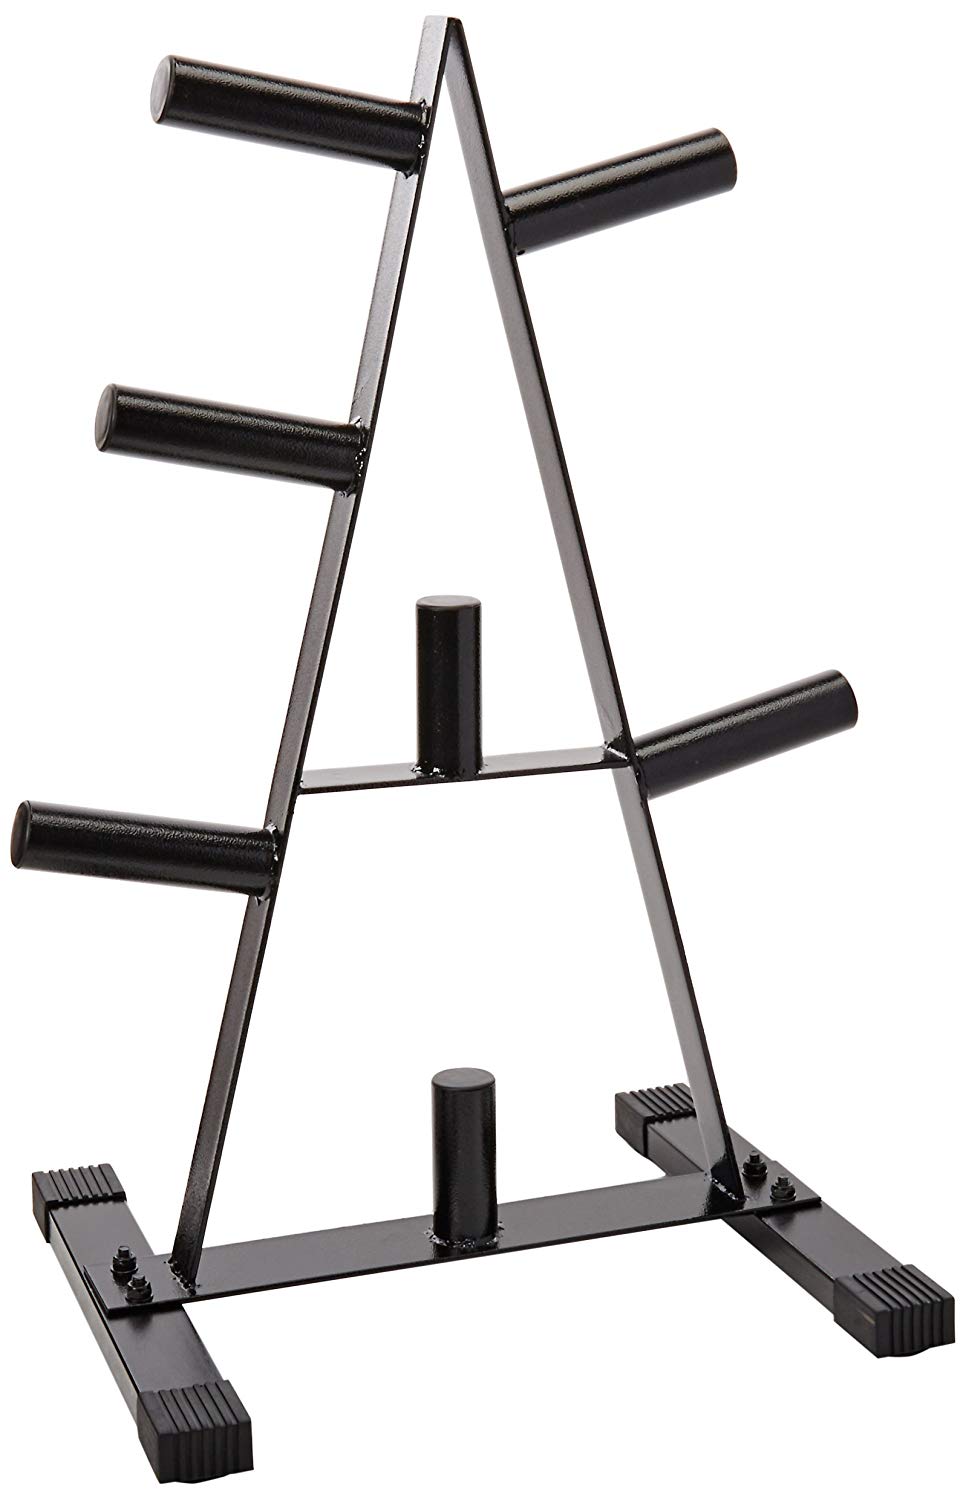
CAP Barbell Olympic 2-Inch Plate Rack

Product Highlights
Keep your plates off the floor and right where you need them with the CAP Barbell 2 inch Plate Rack. Made for either home or commercial use, this rack offers ample storage for 2 inch plates, keeping them off your floor and right where you need them.
Pros & Cons
Bottom Line
The cheapest weight plate tree that we recommend is the CAP Barbell Olympic 2-Inch Plate Rack. With most storage items, we don’t feel the need to recommend as strong and heavy-duty of equipment because it’s really only there to hold things.
The CAP Weight Tree is certainly not the pinnacle of great craftsmanship. The weight capacity is a bit low at 500 LB, there’s 7 total pegs, but 2 of those are made for change plates, the pegs are pretty short, and the height of the tree at 37″ is really only designed for iron plates and would not work for bumper plates.
However, if you can overlook all of these shortcomings and align your expectations with what is offered, this will get the job done for years to come. Reviews are consistently good, with the main criticism being a wish that CAP would remove the middle post on the side with three posts.
Best Value Weight Tree
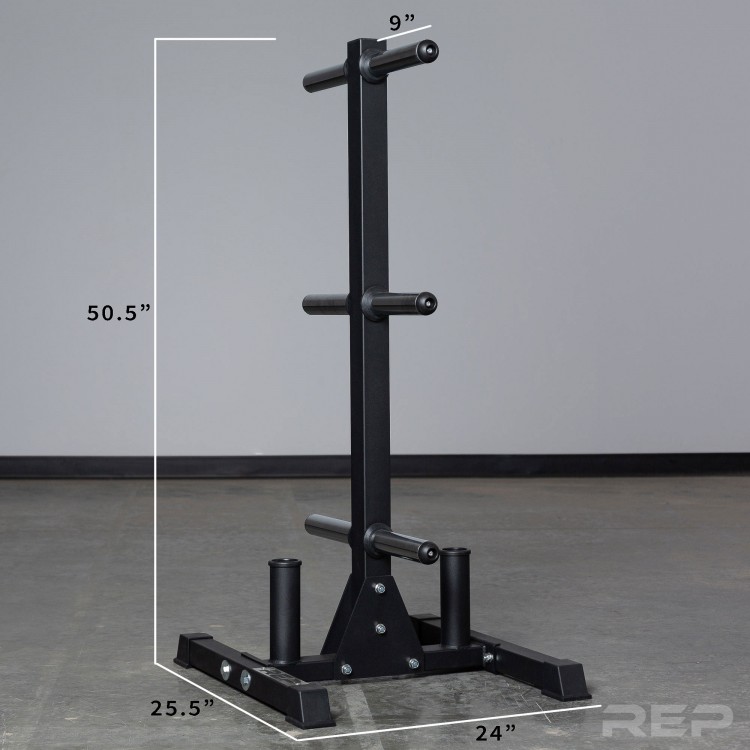
REP Bar and Bumper Plate Tree

Product Highlights
The Rep Fitness Plate tree has 6 weight pegs total, which fit bumper plates on every level. Each peg is chrome coated so that the plates slide on and off very easily, and there is no flaking paint from constant use.
Pros & Cons
Bottom Line
The REP Bar and Bumper Plate Tree from Rep Fitness is a mid-level plate tree that offers smart features for a good price, all things considered.As indicated by the name, this plate tree is designed for bumper plates which have a consistent diameter compared to iron plates which vary based on the size.
At $99 as of this writing, you get a lot of bang for your buck. Features include two upright barbell holders, 6 total plate holders that are evenly spaced, chrome-plated weight pegs that won’t scar your plates or look scratched up after a single workout, and rubber feet on the corners to prevent slippage. Overall, we don’t see a reason to spend much more than this, unless you want wheels or a product made in the USA.
Made in USA Weight Tree
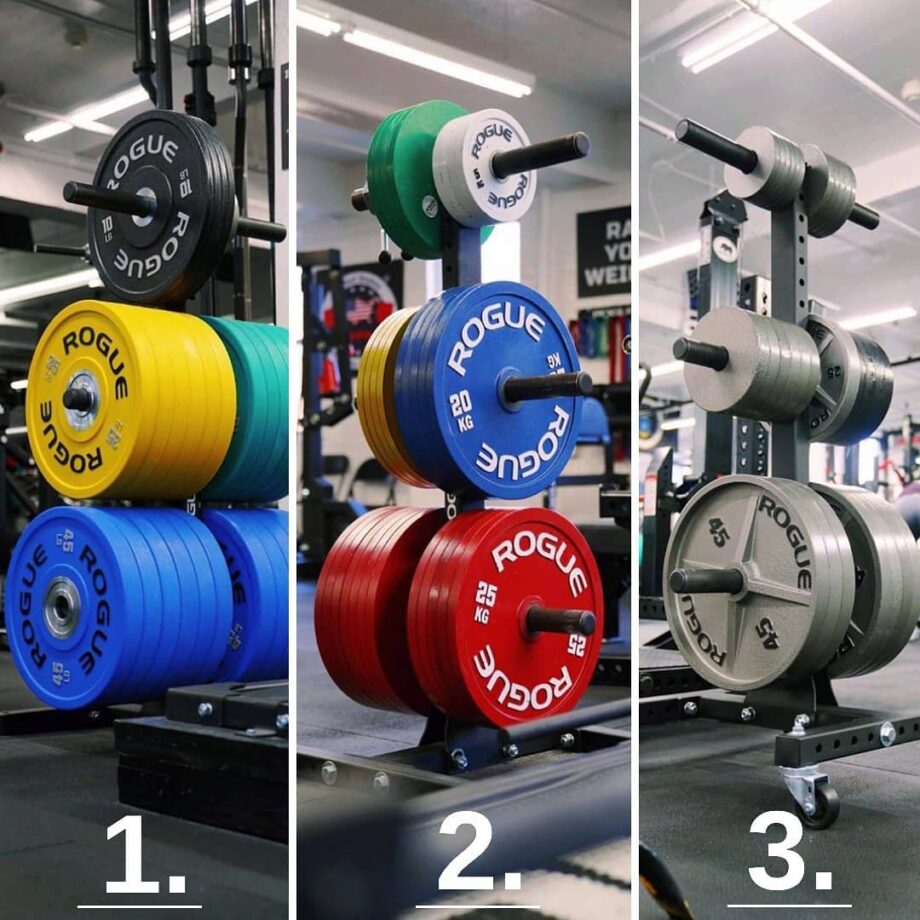
Rogue Vertical Plate Tree 2.0

Product Highlights
The simple, old-school plate tree is still the gold standard when it comes to efficient bumper storage at affiliates and garage gyms around the globe. That said, there’s always room for a little refinement.
Pros & Cons
Bottom Line
The Rogue Vertical Plate Tree 2.0 is similar in size to the REP Bar and Plate Tree, but is quite a bit more heavy duty. Rather than a bolt together design, the plate posts are welded to the upright giving them a higher weight capacity. In addition, casters are available if desired. We do not like that the posts are powder coated as it is more likely to lead to scratches, but this is a staple that’s used in CrossFit boxes and home gyms.
One thing to be aware of, however, is the caster wheels are not lockable and the bolts on the bottom of the plate tree can scratch plates, which is something people often request changes on.
DIY Weight Tree FAQs
What is a weight tree?
A weight plate tree is a pole with pegs on the side that are used to hold weight plates. The name originates from the shape’s resemblance to a tree. Plate trees are useful for plate organizing and can help you save time while changing bar weights.
Can you use a standard weight tree for Olympic weights?
It’s also ideal for Olympic plates, despite the fact that it’s designed for regular plates. Olympic plates just have a larger hole in the middle, making the pegs a little smaller, but this has no effect on the tree’s functioning.
How do you store weight plates?
A dedicated weight rack is the best place to keep your plates. These racks are inexpensive, and you can construct them yourself if you’re handy using the above instructions. Just be sure they can handle the weight you intend to keep. The perfect weight plate rack is inclined, allowing you to conveniently load and unload plates.
Further reading

Looking for an inexpensive bar for multiple uses and strength training methods? Read our Living.Fit Barbell review to see if this bar can suit your needs. Read more

Looking for some guidance in your fitness app? Check out our picks for the best online personal trainers on the market. Read more

Check out our comprehensive guide on how to adjust a treadmill belt, whether you need to tighten, loosen, or align it. Read more

There may be no TrueForm discount code out there, but that doesn’t mean you can’t save money on one of the best treadmills. Read more

