We test and review fitness products based on an independent, multi-point methodology. If you use our links to purchase something, we may earn a commission. Read our disclosures.
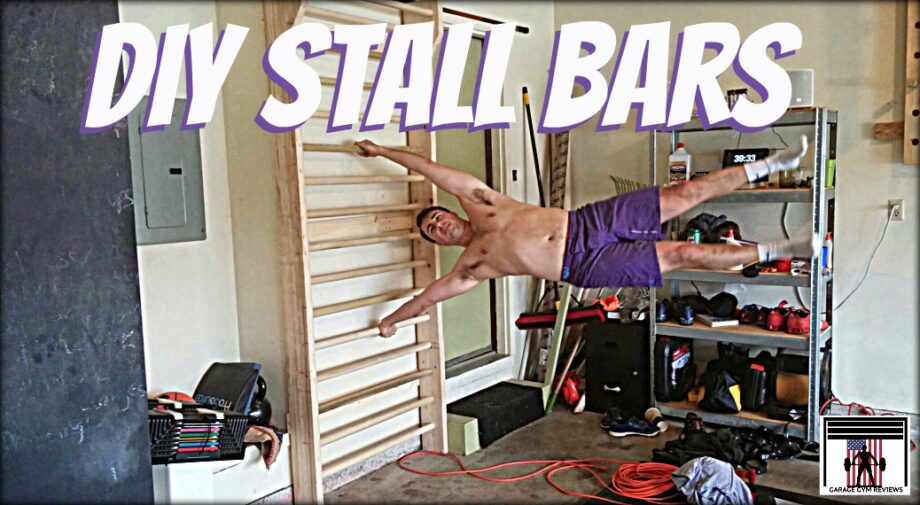
Stall Bars are an incredibly versatile and useful piece of equipment. Unfortunately, when bought commercially, they’re quite expensive. Thankfully, you can make your own DIY Stall Bars using our guide.
If you were to walk into any gym in the 1950’s you would find stall bars.
They look like a completely vertical ladder made out of wood. When I first saw them I had no idea what they were for or why someone would have them in their gym.
Then I saw this video:
And I realized just how awesome they would be to have in the garage.
You know, because the more equipment you have in your garage, the more manly you are.
This set me off on a search for stall bars.
I looked far and wide for companies that made pre-made stall barsto buy and couldn’t find much.
Rogue Fitness had some metal stall bars(surprise, surprise) in one of their YouTube videos but told me they wouldn’t sell them due to liability reasons. (Like selling squat racks and barbells leaves you any less liable)
So, like any DIY’r I set out to make my own set. And to my amazement, they’re better than imagined.
Also, a slight side note, I can not do anything the girl in the above video does. None of it. So don’t go into building a set of stall bars with the idea that you will magically be able to be acrobatic and graceful.
Pre-Made Stall Bars
Rogue Stall Bar 3.0

Product Highlights
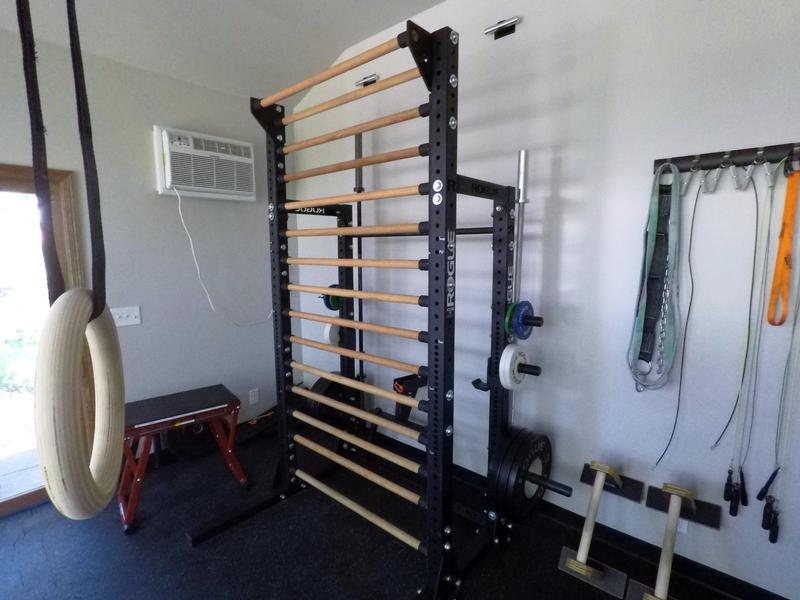
Newly redesigned as a bolt-together unit, Rogue Stall Bars adapt the classic Swedish Ladder gymnastics apparatus into a heavy-duty 21st century training tool—with almost limitless applications for any type of athlete. The unit is available with your choice of wood or metal rungs, and comes in two different kits: Wall-Mount and Rig/Rack Mount.
Pros & Cons
Bottom Line
Supplies
- TWO8′-10′, 2″ x 8″ Board (Uprights. I chose this size because I wanted a pull-up bar at the top)
- ONE 10′, 1″ x 4″ Board (For Bracing and Drilling into Studs)
- EIGHT 8′, 1 1/4″ Wooden Dowels (Preferably Hardwood like Oak, but Pine will Suffice)
- Box of 1″ Wood Screws
- Wood Glue – Titebond III is the best for this kind of job in our experience
- Sandpaper Optional, but recommended
- Wood Stain Optional, but recommended
Tools
A quick word on tools. I have a lot of tools. You don’t need a lot of tools to make things, but they sure do help cut down time spent making. For this project you can get away with using very few tools, it’s really up to you. However, I will list what I used and possible alternatives:
- Drill Press – alternative: Power Drill
- 1 1/4″ Forstner Bit – alternative: Spade Bit
- Power Drill – alternative: Just go buy a power drill
- Miter Saw – alternative: Handsaw
- Jig Saw – alternative: Handsaw
- Rubber Mallet – alternative: Brute Force
- Pencil
- Level
- Tape Measure
Instructions
The measurements I’m going to list are for 8′ tall, 4′ wide stall bars. Make adjustments according to the space you have available.
- Cut the 8′ dowels in half using a miter or handsaw. Make sure all dowels are the same length.
- Draw out how you want the uprights to look. I measured mine in half long ways and then drew a slant towards the corner to allow for the addition of a pull-up bar.

3. Using the Jig Saw cut out the section of the uprights you don’t need that you drew out.
4. Measure out your hole pattern. For mine, I marked the center of the holes 6″ apart from each other. The bottom dowel I measured 6″ from the floor. The top dowel is 6″ from the dowel below it, but is pulled out so pull-ups and strict toes to bar can be done. Make sure you mark the holes on both sides of the upright, you’ll thank me later.

5. Here’s the tricky part. Make a mark on your Forstner Bit of how deep you want it to go in to the wood. I marked mine 1 1/2″ from the tip of the bit so it wouldn’t go all the way in.
6. Drill the marked holes. This will take some time. A drill press is very helpful because you can keep it straight, but if you only have a drill make sure you have batteries charged and you’re keeping the barrel straight.

7. Fill one of the upright’s holes with wood glue and insert the dowel in the hole using a rubber mallet. You want the dowel to fit tight, and if you drilled the holes straight it will.
8. Once all of the dowels are attached to one side of the uprights, fill the other upright with glue and attach using the rubber mallet. This took some time to get all of the dowels lined up, but with the help of my wife, turned out beautifully.

9.Now that all of the dowels are glued and in place, grab your screws and screw the dowels in place from the outside of the upright. Remember how I said you’ll thank me later for marking holes on both sides of the upright? This is that time. You can thank me in the comments section 😉
10. The stall bars should be built now excluding the mounting hardware. Take the 1″x4″ board and cut 2 -4 pieces the width of the stall bars. Screw the boards into the back of the stall bars uprights.
11. Using a studfinder find the studs and screw the board to the studs.

12. Stand back, grab a brew, your dog, a nice sunset, and admire your craftsmanship.


When I built these stall bars, I kind of just went by feel and combined some plans I saw with some drawings of my own. However, I know a lot of people like to have plans they can see and work off of. So, here are some plans of various stall bars I gathered across the web universe, also known as the webiverse.


The stall bars are great for all sorts of things.
I do sit-ups of the bottom. Strict toes to bar. Pull-ups. Stretches. Handstands. L-Sits. Dry sweaty gym apparel. And a lot more.
I’m kind of surprised I got away without it in the past because of how much I use it.
Rogue Stall Bars
Many people want stall bars but don’t want to build them. I understand this and although I love the process of building equipment, I can see how others would rather exchange fuel units for their equipment.
Up until now, you pretty much had to build your own. There were a few companies manufacturing wood stall bars but the new bars that Rogue has released after me begging them for years to make a set look absolutely awesome!
See for yourself:
Rogue Fitness
Rogue Stall Bar 3.0

Product Highlights
Newly redesigned as a bolt-together unit, Rogue Stall Bars adapt the classic Swedish Ladder gymnastics apparatus into a heavy-duty 21st century training tool—with almost limitless applications for any type of athlete. The unit is available with your choice of wood or metal rungs, and comes in two different kits: Wall-Mount and Rig/Rack Mount.
Pros & Cons
Bottom Line
Final Thoughts
If you want to increase your flexibility or get more into the gymnastics type of training than stall bars are an absolute must.
The amount of exercises you can do with them can really only be understood when you have the bars available.
They also take up very little space. You screw them into the wall and they’re out of the way, ready to be used when you would like to start using them.
So grab your materials and get to work. Like my dad always said, “They aren’t going to build themselves…”
Further reading

Stall Bars are an incredibly versatile and useful piece of equipment. Unfortunately, when bought commercially, they’re quite expensive. Thankfully, you can make your own DIY Stall Bars using our guide.If you were to walk into any gym in the 1950’s you would find stall bars.They look like a completely vertical ladder made out of wood. When I first saw them I had no idea what they were for or why someone would have them in their gym. » Read more about: DIY Stall Bars » Read more

A CPT describes how to do the kettlebell bench press with the correct form, common mistakes to avoid, and the benefits of performing this resistance exercise. Read more

Stall Bars are an incredibly versatile and useful piece of equipment. Unfortunately, when bought commercially, they’re quite expensive. Thankfully, you can make your own DIY Stall Bars using our guide.If you were to walk into any gym in the 1950’s you would find stall bars.They look like a completely vertical ladder made out of wood. When I first saw them I had no idea what they were for or why someone would have them in their gym. » Read more about: DIY Stall Bars » Read more

The Rogue RML-90SLIM Rackis the most compact and best-priced squat rack that Rogue Fitness makes. It’s an extremely simple rack that is designed for the budget-conscious and space-restrained, yet offers most of the functionality of a standard squat stand with a pull-up bar while sitting only 16” from the wall. After testing and reviewing the RML-90SLIM, we recommend it highly and actually think it’s one of the best squat racksfrom Rogue to date. Read more

