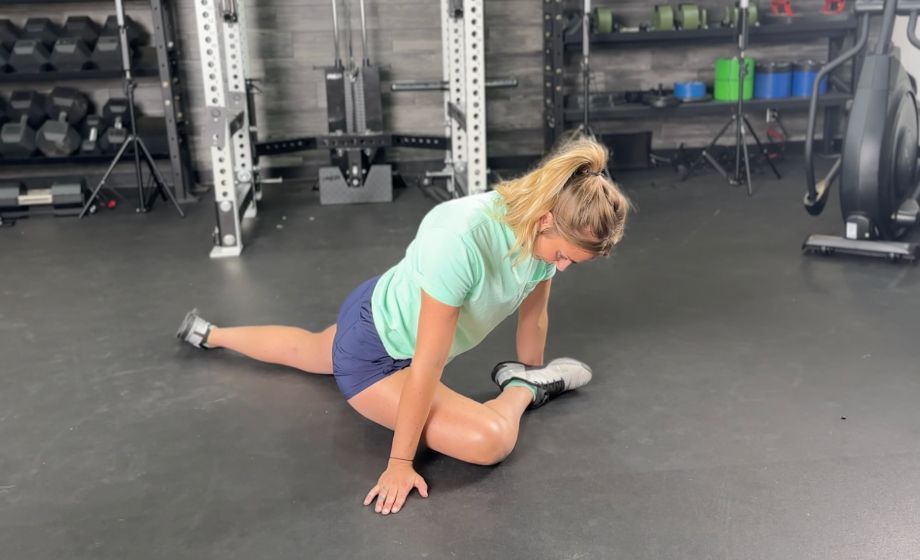
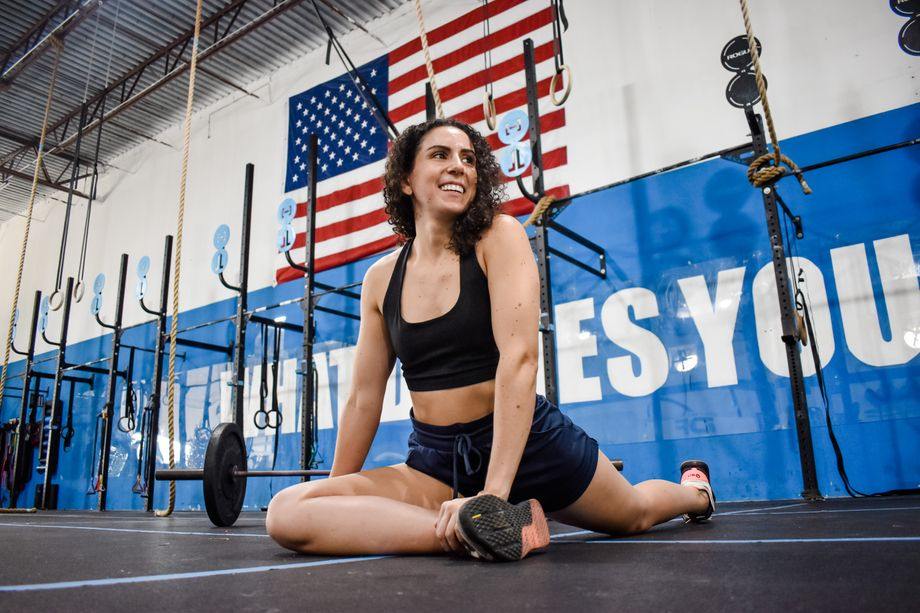
The pigeon pose is a classic hip opener that may offer relief to tight hips, lower back pain, and achy piriformis and psoas muscles. It’s not only a hip flexor exercise used by lifters before squats and deadlifts, it’s an active yoga pose that can be modified for all skill levels.
In this guide on how to do pigeon pose, I, a certified personal trainer, will walk you through a step-by-step guide and offer a few alternatives to the pigeon pose.
How To Do Pigeon Pose
Muscles worked: Glutes, piriformis, and hip flexor muscles including the iliacus, psoas, pectineus, rectus femoris, and sartorius.
How to do it:
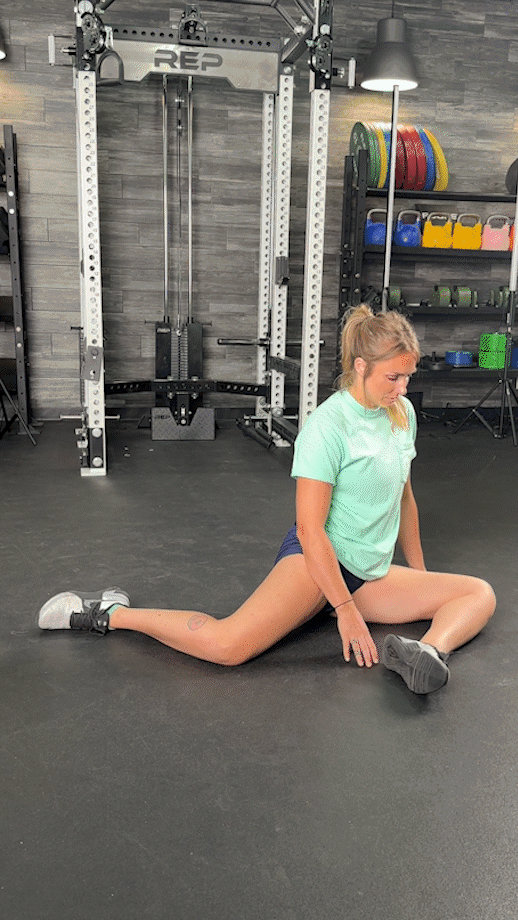
- Start by getting into a plank position or downward dog.
- From there, slide your right foot behind your right wrist and lower your right knee and shin down to the floor at a 45-degree angle.
- Once your pelvis is on the floor, fully extend your left leg straight behind you and allow the top of your left foot to rest on the floor.
- Square your hips and be sure you’re not letting your body weight drop to your right side (the folded leg). The right side of your buttock will be slightly lifted from the floor.
- Walk your hands back toward your hips and straighten your posture so your head is stacked over both your torso and hips.
- In your bent leg, you should feel a stretch through your outer hip and glutes. In your back leg, you should feel a stretch through the hip flexors.
- Hold the pose for 5 to 10 deep breaths, roughly 20 to 30 seconds.
- To release the pose, unfold your right leg and return to your starting position.
- Repeat the same steps on your left leg.
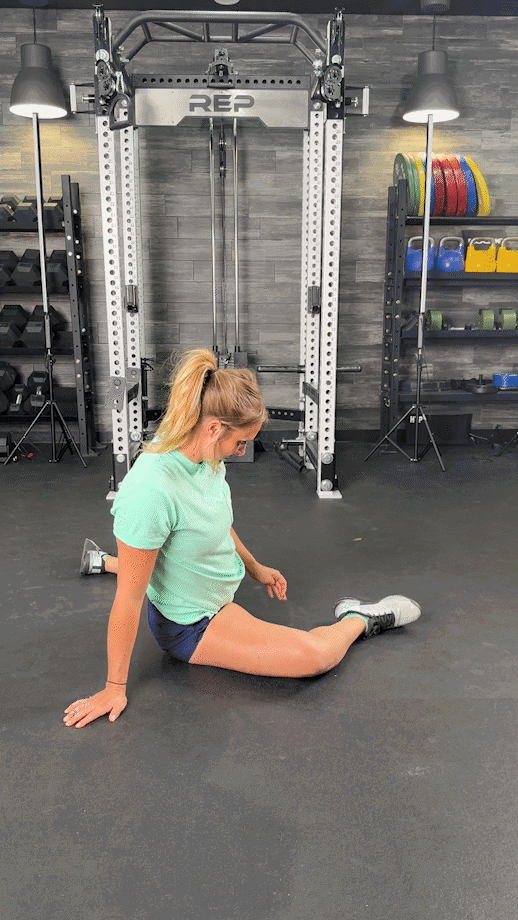
Expert tip: Turn this into a deeper stretch by bending forward at the waist and lowering your upper body to the floor.
Trainer Tips for Form
In yoga practice, it’s common to enter a pigeon pose from a downward facing dog position, but it’s not required. You can approach this mobility exercise from a plank position or from your hands and knees in a quadruped position.
RELATED: Plank Exercises
It’s worth noting if you experience very tight hips, you may need a yoga block to support your hips or start with a few mobility exercises to prepare for the pigeon pose.
Common Pigeon Pose Mistakes
The pigeon pose can be a difficult movement, requiring a lot of mobility from the hips and knee joints. It’s not uncommon to find yourself in one of these common faults:
Shifting Your Hips Toward the Bent Knee
The pigeon pose offers a powerful stretch because it’s an active position for both the front leg and back leg. It’s easy to “rest” in the pigeon pose allowing your hips to dip to the floor. Be sure to actively keep your hips square, keeping the buttock slightly off the floor (on the side of your bent knee).
Not Straightening Your Back Leg
Beginners and folks with limited mobility may find it difficult to keep the back leg straight. To maintain a straight-leg position, be sure to push your back leg into the floor and drive the hip flexor upward so it doesn’t open up to the side.
RELATED: Best Quad Stretches
Forcing Your Front Leg to Make a 90-Degree Angle
Your front leg doesn’t have to be positioned so that your shin is parallel to the front of the mat. Not everyone can reach a perfect 90-degree angle in the pigeon pose. I suggest starting with a more acute 45-degree angle and opening the front knee bend with more practice.
RELATED: Best Exercise Mat
Holding Your Breath
The trick to any quality asana (aka yoga pose) is breathing. Be sure to inhale and exhale long, slow, deep breaths for maximum stretch and hip flexibility.
Pigeon Pose Variations
It’s important to know there are ways to get similar benefits of the pigeon pose without getting into the exact position. It’s also possible to modify the pose with a yoga block or blanket under the side with a bent leg to help keep your hips propped up and square.
As noted in the pigeon pose instructions above, you can also fold your upper body to the floor for an even deeper stretch. And with additional practice (and instruction from a yoga teacher) you can lift your back leg into a one-legged king pigeon pose—also known as “eka pada rajakapotasana” in Sanskrit.
RELATED: Best Hamstring Stretches
For folks looking to warm up into the pigeon pose, here are two variations I suggest trying:
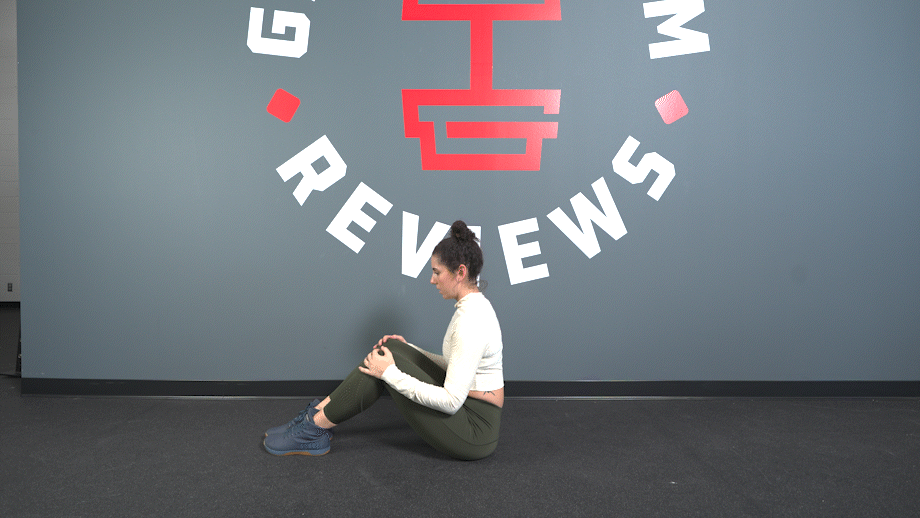
Lying Figure Four Stretch
Why do it: The lying figure four is one of the most gentle ways to ease your hips into this bent-knee stretch position because your body weight isn’t bearing down on your joints.
How to do it:
- Start by lying face up on the floor with your knees bent, feet flat on the floor.
- Lift your right foot and cross your right ankle over your left knee, forming the shape of the number 4 with your legs.
- Thread your right hand through your legs and your left hand around the outside of your left thigh.
- Clasp your hands (or grab on to your legs depending on how far you can reach) and gently pull your left leg toward your chest until you feel a stretch in your right hip.
- Hold the pose and take deep breaths for 20 to 30 seconds.
- Release your grip and repeat on the opposite side.
90/90 Hip Stretch
Why do it: The 90/90 hip stretch is a modified version of the pigeon pose, with both legs bent making it ideal for most people who feel comfortable stretching on the floor.
How to do it:
- Start by sitting on the floor with your knees bent and feet flat on the floor.
- Lay your right leg in front of you with your shin on the floor at a 90-degree angle.
- Extend your left leg to the side, with the inside of your knee toward the floor and your knee bent at a 90-degree angle.
- Square your shoulders to your front leg (right leg) to feel a gentle stretch through the hips and glutes.
- For more stretching through the hips, glutes, and low back, keep your back flat and hinge your upper body toward the floor.
- Hold the position and breathe for 20 to 30 seconds.
- Push yourself upward and repeat on the opposite side.
How To Do Pigeon Pose: Final Thoughts
As a certified personal trainer, I highly recommend starting with the lying figure four stretch or the 90/90 hip stretch before trying the pigeon pose. It’s also important to keep in mind the pigeon pose may offer temporary relief to the tightness you feel in your hip flexors, but if you experience chronic pain you may need to consider strengthening the muscles surrounding your hips including your glutes, hamstrings, and deep hip flexors.
How To Do Pigeon Pose: FAQs
How to do pigeon pose for beginners?
Beginners can start with similar hip stretches like the lying figure four stretch and the 90/90 hip stretch. From there it’s possible to work up to the pigeon pose with a block under the hips for additional support.
What is tight if I can’t do pigeon pose?
There are several factors that might prohibit a successful pigeon pose. A likely reason is the muscles of hip flexors are tight or in a shortened position from sitting, making it difficult to draw the back leg into a straight position. The glute and piriformis could also be tight from sitting, strength training, or other strenuous activity.
How long should I hold a pigeon pose?
Our experts agree that holding the pigeon pose for several deep breaths or about 30 seconds is an ideal amount of time to aim for or work up to.