We test and review fitness products based on an independent, multi-point methodology. If you use our links to purchase something, we may earn a commission. Read our disclosures.
Do you remember before your fitness journey began and “cleaning” was that dreaded chore you’d try to make a priority over the weekend? Nowadays, you hear the word “clean” and you’re loading up one of the best Olympic barbells and flinging it into the front rack position with speed, precision, and power.
More and more people today have become acquainted with the Olympic lift, presumably due to CrossFit’s liberal usage of the clean and jerk in various WODs, and why wouldn’t they?
“Cleans are one of the best exercises for developing explosive strength and power in the entire body,” says competitive weightlifter, certified personal trainer, and GGR Head of Content Kate Meier.
The merits of this barbell exercise are widely-documented and well-known, but what about the version that uses the endlessly-versatile and infinitely more convenient kettlebell?
Can you get the same full body gains performing a kettlebell clean instead?
We think so, so we’re discussing today how to do kettlebell cleans, including trainer tips for proper form, common mistakes to avoid, and useful accessories that will aid in your success along the way.
RELATED: The Best Kettlebells
How To Do A Kettlebell Clean
(Note: This describes doing a kettlebell clean from the floor. You can also do a hang clean, in which you lower the kettlebell between your legs, but it never touches the ground.)
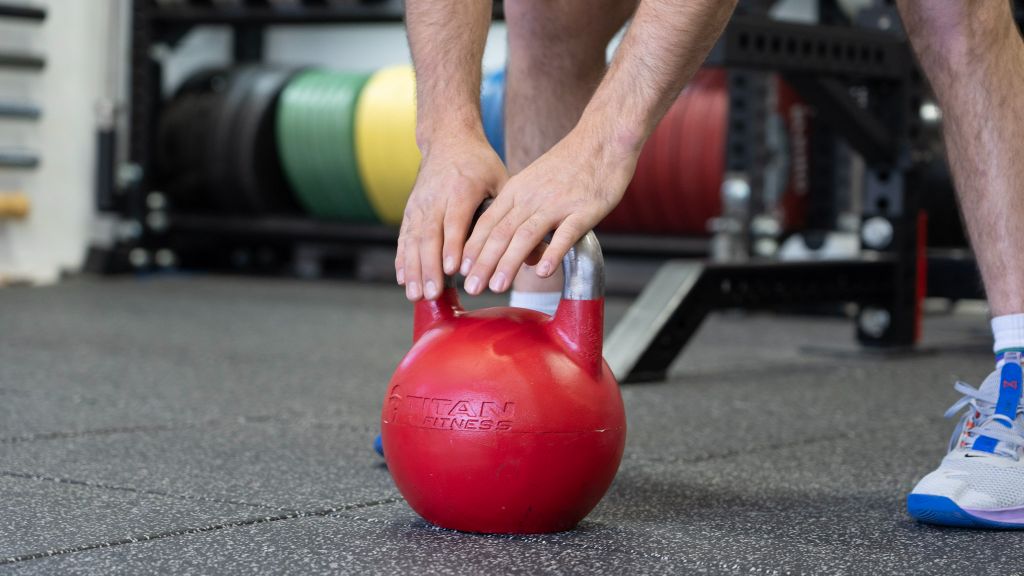
- Select your kettlebell and place it on the floor in front of you.
- Stand with your feet approximately shoulder-width apart with your weight on your heels and your toes pointing outward slightly.
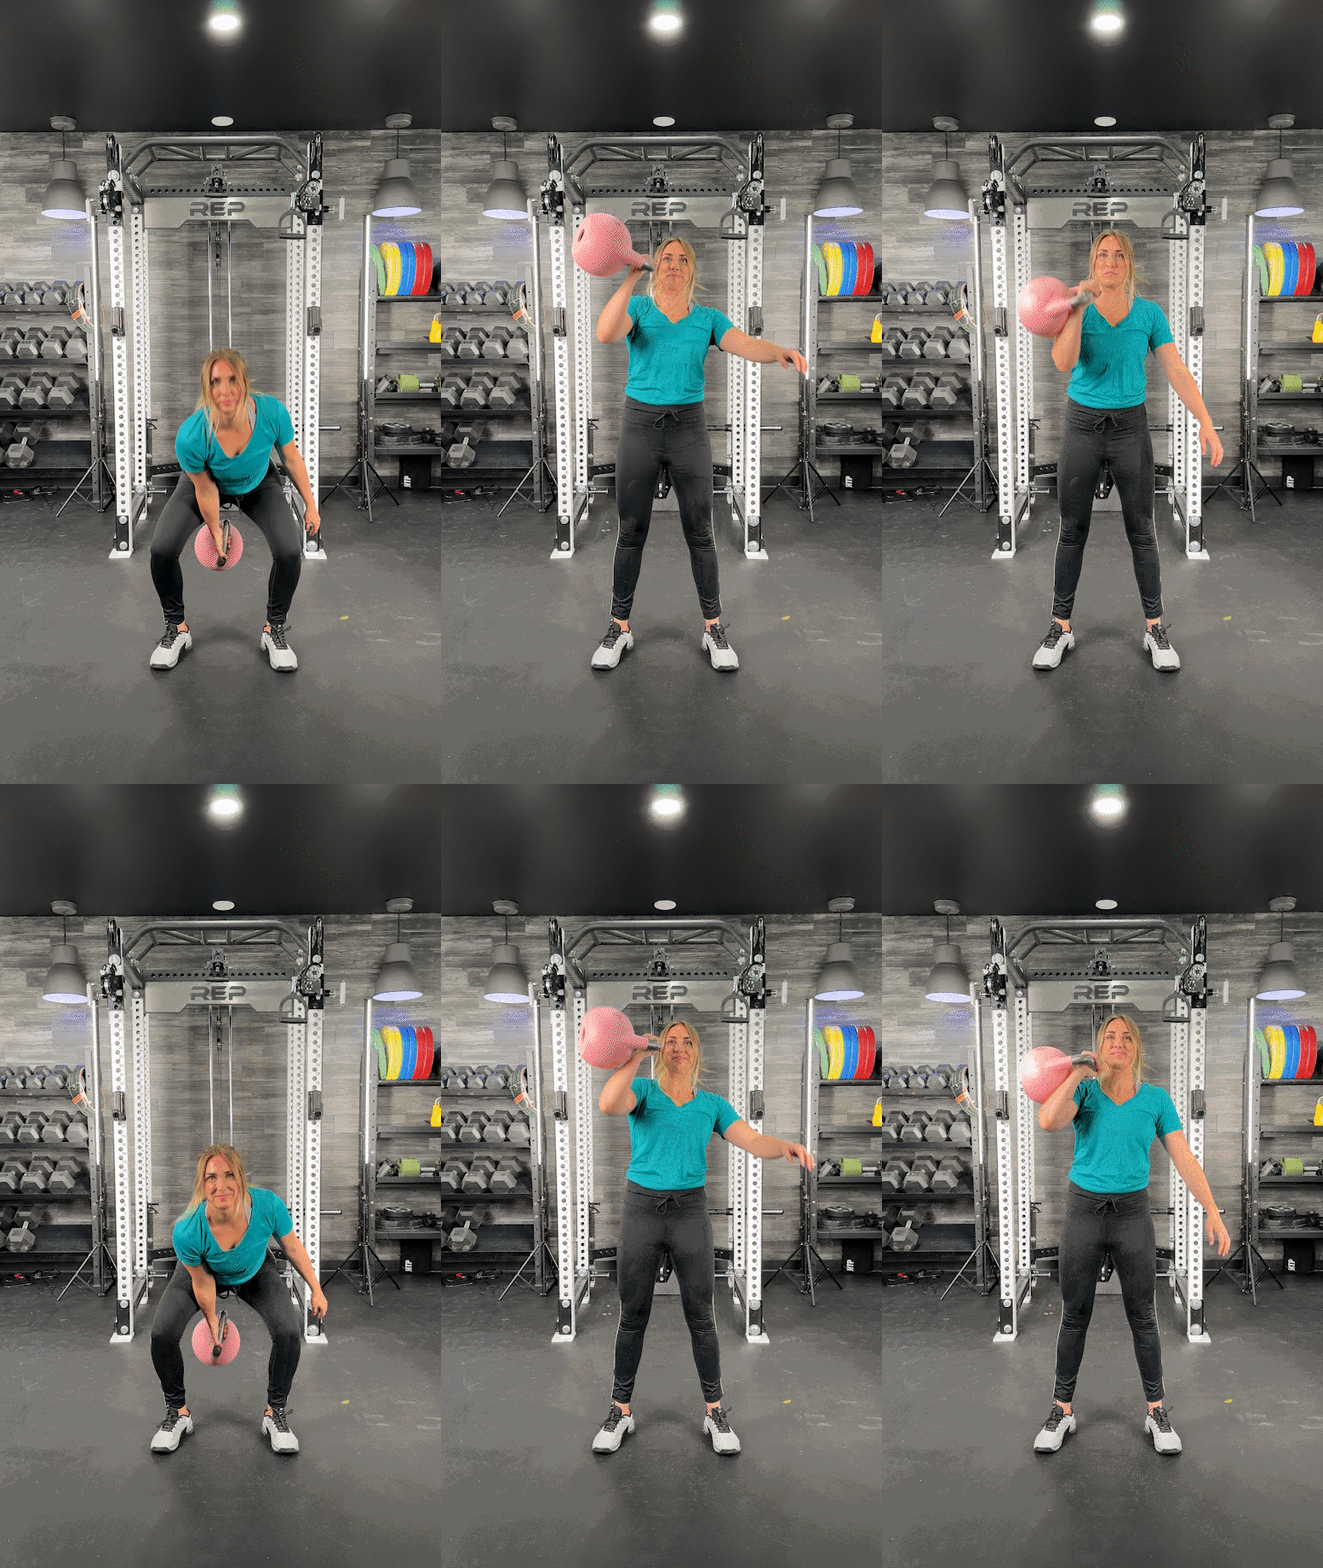
- Squat down to grip the kettlebell handle with one hand using an overhand grip. You want your back flat, spine neutral, hips back, and knees bent. This is your starting position.
- Pushing through your heels, explosively drive your hips forward and stand, pulling the kettlebell up with your arm simultaneously.
- As the kettlebell rises, flip your hand so that your palm now faces upward.
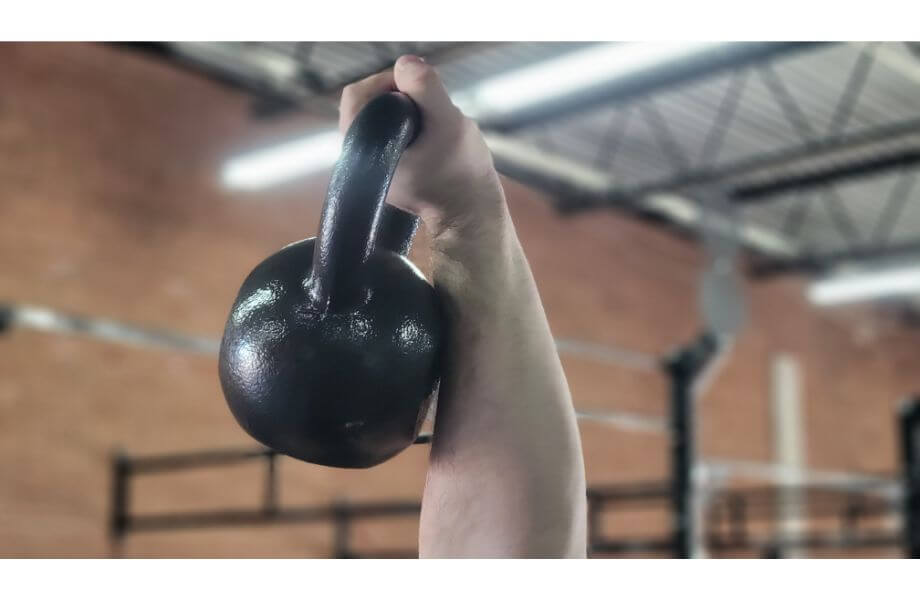
- When the kettlebell reaches chest height, quickly tuck your elbow and allow the kettlebell to roll around your wrist. You want to catch it “in the pocket” next to your arm, eventually resting it on your forearm in the rack position. Your wrist should be straight, your palm facing inward, forearm vertical, and kettlebell stacked directly above the elbow.
- Slowly lower the kettlebell back down to the floor.
- Repeat as needed, then switch sides and repeat the set.
Trainer Tips for Form
Like the kettlebell snatch, the KB clean is smooth and quick when well-executed. Experts know, however, that there’s a lot going on during this kettlebell exercise, and so you’ll have to be mindful of your form throughout the full movement.
Here are some tips to help fine tune your form.
Get the Hip Hinge Right With Kettlebell Swings
Exercises like the kettlebell clean and snatch are intimidating, especially for beginners who may have very little experience with kettlebell training as a whole.
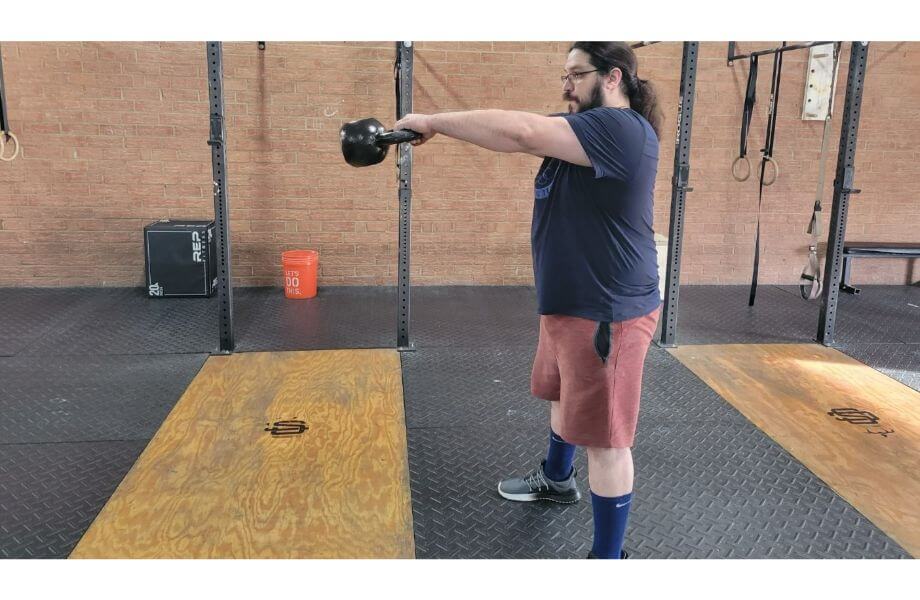
Starting out with kettlebell swings is a great starting point, serving as a stepping stone to more advanced kettlebell exercises like the clean, clean and jerk, and snatch.
Not only does the kettlebell swing help you build comfort and familiarity with kettlebells in general, it also helps you get comfortable with the explosive hip hinge movement that will be crucial during the clean.
Practice the Parts Independently
What did they teach us in school when a problem was complicated and had too many steps to keep track of? Breaking it down into parts, of course!
The kettlebell clean can be tackled in the same way. Grab the kettlebell, get into your starting position, and focus first on the hip hinge. The hip hinge alone will feel a little like a deadlift, since both movements involve bringing the hips forward, then back. Forward, then back.
Once you’re good on the simple hip hinge, graduate to a hip thrust. We want to add explosiveness to the movement at this juncture, but we’re not bringing the kettlebell to the front rack position just yet. A thrust to get it swinging slightly is enough for now.
If you’re feeling strong with the lower body portion of the exercise, now it’s time to work on what your upper body is up to in the latter part of the movement. Performing a strict kettlebell high pull will help develop surrounding muscle groups like the triceps, forearms, and shoulders, but remember that the clean is not an arm exercise. For this reason, we’ll call it more of a “hip-assisted high pull.”
Thrust those hips forward and initiate the high pull, but then let the kettlebell fall back down. As you grow comfortable standing up forcefully, creating a powerful hip hinge, and getting some height on the kettlebell, it’ll be time to face the most daunting portion of the movement—the elbow rotation.
Breaking down this complex movement into more digestible portions is an excellent way to get comfortable with the mechanics.
Kate Meier, Certified Personal Trainer
Many people are afraid of this part because, if done without proper technique, you can wind up with a heavy ball of iron slamming into your forearm or wrist. Practicing this portion will be key in preventing that from happening.
Focus on bringing the arm around the kettlebell rather than the kettlebell around your arm. The idea is to move so that the kettlebell will fall “in the pocket,” or essentially the empty space next to your forearm rather than slamming directly into it. Keeping your elbow tucked and your arm close to the body will help assist in this essential movement.
“Breaking down this complex movement into more digestible portions is an excellent way to get comfortable with the mechanics,” Kate says. If you’re having trouble with any part of the exercise, consider working with a coach or personal trainer to perfect it.
Start With Dumbbells
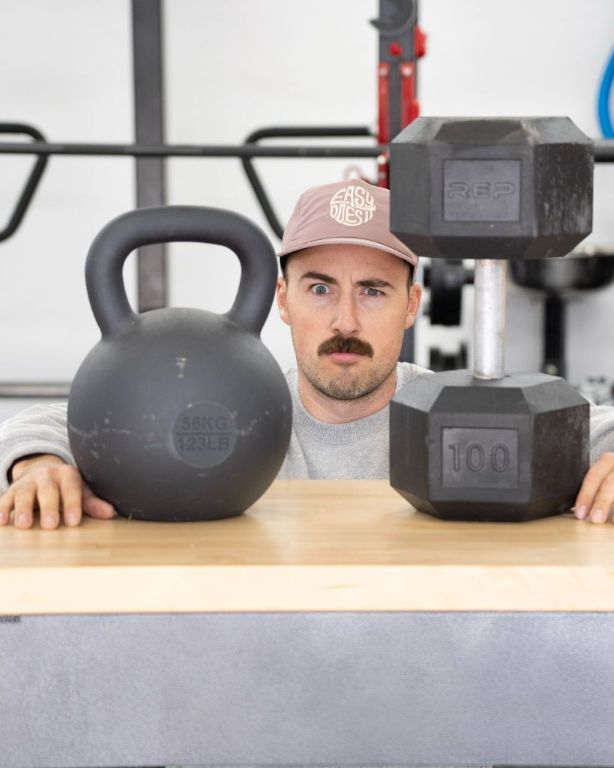
Kettlebells are becoming increasingly popular these days, but the tried-and-true dumbbell remains the free weight favorite for exercises like these.
If you’re daunted by full-body kettlebell workouts or worried you’re going to get slammed with the kettlebell over and over, try using a dumbbell first.
Using a dumbbell lets you practice all the essential parts of the exercise from the initial hip hinge to bringing the weight to the front rack position, but it’s easier since no part of the dumbbell should swing around and smack you as you iron out the kinks in your technique.
Common Kettlebell Clean Mistakes
The kettlebell clean involves a lot of steps, like the Turkish get-up, leaving a lot of opportunities for things to go wrong.
Unlike the Turkish get-up, however, it all happens in the blink of an eye, so you’ll need to be extra attentive to find faults in your form while working to learn and master this excellent full body exercise.
Here are some of the most common kettlebell clean mistakes and tips on what you can do to correct them.
RELATED: The Best Kettlebell Exercises
Not Reaching Full Hip Lockout
So much of your strength for the clean relies on a strong hip thrust, so you’ll shortchange the movement and diminish your power if you’re not reaching full hip lockout.
Make sure you’re bringing your hips all the way back as you initiate the movement and bring them all the way forward with force as you launch the kettlebell upward and pull it into position. Squeezing your glutes at the end of the movement will help ensure your hips are as far forward as you’re able to physically allow.
If you’re having issues with hip mobility or flexibility, try incorporating a few exercises into your warmup designed to open them up. Lying hip rotations, kneeling lunge stretches, and even pigeon pose are excellent for stretching those hip flexors and loosening things up before you get down to business!
Pulling With the Arms Before Reaching Hip Lockout
If your hip thrust is anything less than explosive, you won’t get enough force to propel the kettlebell upward into position. What happens next in this scenario? You wind up performing a high pull, essentially, instead of an actual, legitimate clean.
Refrain from premature pulling.
You want a full hip lockout before starting to pull at all with your arms so you can guarantee the majority of the work is thanks to your lower body strength and technique.
Allowing the Weight to “Flop” Onto the Shoulder
Getting the kettlebell to fall neatly into the pocket is an exercise in pure precision, and it’s why so many beginners struggle and eventually give up on this incredible movement.
Having the kettlebell bang into your wrist, forearm, or shoulder is a sign you’re missing the mark somewhere. It could indicate over-gripping, overreliance on the arm, too wide of an arc during the kettlebell’s ascent, or a poor hip hinge power output.
Make sure you’re really snapping those hips forward for power, not your arms, and keep everything close– your hand, arm, elbow, the kettlebell, everything. Imagine you have a book tucked under your arm and you’re zipping up your jacket. This will help you keep things close and tight and help optimize your movement pattern.
If you need a visual to help, stand a few feet from a wall and clean with the wall in front of you. Seeing it in front of you, even though you’ve already made sure you would never accidentally hit it, will encourage you to keep everything close to the body.
Relying on the Arms, Not the Hips, for Power
It doesn’t matter if you’re doing a dead clean from the floor or a power clean from the hang position; the power of the clean comes from your hips. Period.
If you’re muscling the weight up to the rack position, you’re not only relying on the wrong muscle group to get the job done, you’re increasing your risk of injury since the clean wasn’t intended to be an arm exercise.
For building muscles in the arms, stick to high pulls and upright rows. If you’re looking for a comprehensive full-body movement that will improve your all-around power output, learn how to perform the kettlebell clean properly and program into your various types of strength training programs.
Kettlebell Clean Variations
Once you can bang out kettlebell clean reps with ease, you might be interested in learning a few variations to keep things fresh in the gym. Here are some of our favorites for switching things up every now and then.
Kettlebell Clean and Press
So, you’ve done the leg work, no pun intended, in learning the clean and you can now get that kettlebell into the rack position. Take things one step further by adding a push press at the end, bringing in your shoulders and triceps for even more muscle activation.
RELATED: The Best Tricep Workouts
From the rack position, dip slightly, push from your heels again, and push the kettlebell into the overhead position, squeezing your glutes at the top. Slowly return the kettlebell to the rack position, then to the floor, then start your next rep.
It doesn’t have to be a push press, by any means. A strict overhead press, push jerk, or split jerk is acceptable as well, provided you’re acquainted with each of these variations.
Dumbbell Clean
As we mentioned earlier, swapping out the kettlebell for a dumbbell is a good way to build comfort before moving onto the main attraction.
The best dumbbells provide a similar stimulus to your muscles, since both free weights utilize static resistance. However, dumbbells feature a more even weight distribution, making them more accessible for beginners.
Plus, they don’t pose any danger to your wrists while you’re working out the finer points of your form, making them safer for novice lifters.
Double Kettlebell Clean
For when a single kettlebell simply won’t do, grab a second one and get ready to look like a complete badass.
To perform double kettlebell cleans, follow the steps outlined above using two kettlebells instead of one. The form will be similar, if not identical, but the addition of the second kettlebell will add an increased challenge to your balance.
It’s a great way to work both sides of the body simultaneously, but please be advised– the double kettlebell clean is an advanced movement. You should be very confident with your form before attempting the double kettlebell clean and, once you do, stick to lighter kettlebells before progressively increasing the load.
Trust us. It’s always better to start light and scale up than to find out the hard way you went too heavy.
Double Dumbbell Clean
Just like the double kettlebell clean, it’s possible to grab two dumbbells and clean them into the front rack position too. The double dumbbell clean has the advantage of hitting both sides of the body simultaneously but, just like its kettlebell counterpart, it poses additional challenges to your balance and stability.
Do not try the double dumbbell clean until you’re proficient with the single dumbbell version first. Once you do try it, start light and work from there. Always better to be safe than sorry.
Useful Kettlebell Clean Accessories
One of the biggest benefits of the kettlebell clean is that you only need a single kettlebell and your lovely self to get the job done. However, there are a few basic accessories that both make things more manageable and fit the “minimalist theme” of the exercise.
Grip Tape
What’s not to love about grip tape?
It’s portable, versatile, inexpensive, and, most importantly, increases friction to help you keep a good grip on the weight when things are getting a bit slippery.
Using grip tape for movements like the kettlebell clean and snatch is extra recommended since the kettlebell handle has a tendency to rub the palm raw during the rotation, leading to chafing, formation of calluses, or tearing calluses clean off. Ouch.
Chalk
Not into grip tape?
Chalk makes a great alternative, as a quick and simple application to your hand before a set of kettlebell cleans will dry up moisture and help you keep a stronger grip.
Since it’s so inexpensive, there’s no reason you shouldn’t use chalk when the weights become more challenging or fatigue sets in. It’s a simple way to make sure you’re getting the best out of every set.
Wrist Wraps
Having some of the best wrist wraps is a double-edged sword on a movement like this. On the one hand, they support and stabilize the wrist, making sure the kettlebell doesn’t hyperextend the wrist and contribute to or cause a wrist injury.
On the other hand, you want some degree of flexibility in your wrists because you need to rotate mid-movement and turn those palms up to the ceiling. An overly tight or obstructive wrap will impede this motion.
Then again, a cushy wrist wrap also provides a nice buffer for while you’re learning, making those punishing kettlebell slaps a little more tolerable while you finetune the form.
If you do choose to wear wrist wraps, you’ll enjoy some benefits and a decreased risk of injury, but make sure you don’t wrap them too snugly.
FAQs: Kettlebell Clean
What muscles does the kettlebell clean work?
Short answer– everything. The kettlebell clean provides activation front the upper back and shoulders down to the calves. Specifically, the kettlebell clean works the following muscles:
Glutes and hamstrings: The hip hinge movement, which is responsible for basically all of the power you’re going to get during the clean, requires engagement of the glutes and hamstrings. These muscles are considered prime movers of the exercise.
Quadriceps and calves: Most of the work is performed by the glutes and hammies, but the quads and calves help too. Your quadriceps stabilize the knee as the kettlebell travels upward, while your calves will receive activation as you drive from the heels and buck those hips forward during the hip hinge.
Core: Your core muscles are essential for maintaining stability, facilitating the movement, and protecting your lower back and spine. The kettlebell clean provides activation in the rectus abdominis, obliques, and transverse abdominis.
Upper back and shoulders: Once the kettlebell travels north of your abdomen, you’ll need your arms and upper body muscles to take over to some degree. Expect to feel some activation in the traps, deltoids, and lats.
Forearms: To maintain a strong grip, you need to have strong forearms. The simple act of holding the kettlebell, let alone performing a clean with it, will tax your forearms.
The kettlebell clean is one of those full-body compound exercises where everything comes together, working in unison, in essentially the blink of an eye.
To the casual fitness enthusiast, it’s impressive and an excellent exercise. To the passionate, dedicated weightlifter, it’s high art.
What are the benefits of kettlebell cleans?
A 2017 study published in the Journal of Strength and Conditioning Research1 cited a number of benefits associated with kettlebell trainings and cleans, stating:
“[Kettlebells] may be an effective and alternative method for conditioning the whole body. Kettlebell conditioning has been used to improve strength, power, and endurance and may also serve as an interesting option for dynamic warm-up. Kettlebell training has also been shown to produce transference of strength and power to traditional weightlifting. Most KB exercises, like the [KB swing, KB snatch, and KB clean], require large muscle groups to be used in an explosive fashion. This may increase the likelihood that strength and power will be transferred across lifting styles.”
That’s not all. A 2013 study published in the Journal of Fitness Research2 observed “significant improvements in aerobic capacity, leg press, grip strength, core strength, and dynamic balance” following an 8-week kettlebell training regimen that included kettlebell cleans among other kettlebell exercises.
Not only do you enjoy a plethora of fitness-focused benefits, kettlebells are also way more convenient than barbells and other traditional weightlifting equipment.
With a single kettlebell and a relatively small amount of floor space, you can get an exceptional well-rounded workout that targets many major muscle groups throughout the body.
Kettlebell cleans boast many, many benefits, making it an absolute no-brainer to add them into your workout routine.
Are kettlebell cleans as good as barbell cleans?
Objectively, the kettlebell clean and barbell clean are both excellent exercises for building muscle strength and size, increasing power, and developing techniques that will translate to improved sport performance and greater ease during ADL, or the activities of daily living.
Which is superior, however, is a subjective choice.
If you like the most bang for your buck and prefer one piece of equipment to provide immense value without the need for extra bells and whistles, the convenience of the kettlebell clean is undeniable. With a single kettlebell, you unlock a world of gains, from kettlebell cleans to snatches to swings.
However, a 2012 study published in the Journal of Strength of Conditioning3 put kettlebell training to the test against traditional weightlifting and, although there were many commonalities observed, the team determined “weightlifting exercises are more effective for strength development.”
For the best results, we recommend rotationally incorporating both into your strength training routine. Not only will it provide variances to the muscle stimulus, but it will help you stave off boredom during the workout, too!
References
1. Lyons BC, Mayo JJ, Tucker WS, Wax B, Hendrix RC. Electromyographical Comparison of Muscle Activation Patterns Across Three Commonly Performed Kettlebell Exercises. J Strength Cond Res. 2017;31(9):2363-2370. doi:10.1519/JSC.0000000000001771
2. Beltz, Nicholas & Erbes, Dustin & Porcari, John & Martinez, Ray & Doberstein, Scott & Foster, Carl. Effects of Kettlebell Training on Aerobic Capacity, Muscular Strength, Balance, Flexibility, and Body Composition. Journal of Fitness Research. 2013; 2. 4-13.
3. Otto WH 3rd, Coburn JW, Brown LE, Spiering BA. Effects of weightlifting vs. kettlebell training on vertical jump, strength, and body composition. J Strength Cond Res. 2012;26(5):1199-1202. doi:10.1519/JSC.0b013e31824f233e
Further reading

Let this year be the year you don't feel like a bowl of mashed potatoes. Use our tips and sample workouts to keep your wellness routine over the holiday season. Read more

Get the best deals on weightlifting shoes and accessories with our exclusive LUXIAOJUN coupon code. Read more

Are you looking to get into the world of bodybuilding? Check out our bodybuilding workouts for everything you’ll need to get started! Read more

Strengthen your knee joints and lengthen your leg muscles with our picks for the best slant boards. Read more
