Imagine having access to several of the machines you see in a commercial gym in your home gym. That is very possible thanks to lever arms. Lever arms are much cheaper than buying several machines, they take up much less space, and while they won’t serve as exact duplicates, they will help you train the muscles effectively so you don’t have to rely on barbells, dumbbells, or kettlebells exclusively. You can even use a resistance band in order to increase the resistance as you perform the motion.
We will share more about what these lever arms are and how they can be used. Then, we will provide you with 10 lever arm exercises you can do with them right now so you can add more versatility and challenges to your garage gym training sessions.
What Is a Lever Arm?
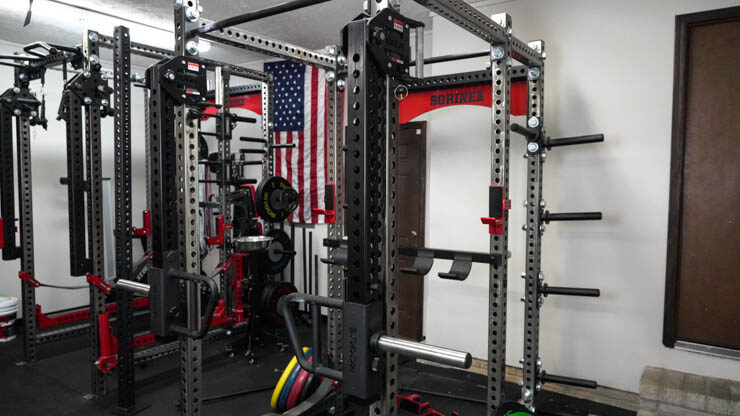
Lever arms, also known as jammer arms, are long power rack attachments that can be connected to a squat rack. Most lever arms have sleeves for you to load weight plates on as well as handles for you to operate the arms, either independently or simultaneously.
Lever arms can be great pieces of home gym equipment because they will allow you to do many exercises that are similar to popular machines that you would see in a commercial gym. Two lever arms can provide several movements that you can add to your training arsenal, which would increase your potential for personal fitness success regardless of the discipline you follow.
RELATED: Best Budget Home Gym Equipment
You can use one at a time like iso arms or both at the same time. Wherever you place the lever arms on the squat rack determines the range of motion you have to work with. You can isolate a specific area or train multiple muscle groups at once. They are very versatile pieces of equipment.
How to Use Lever Arms
Many lever arms have separate handles and plate sleeves that you can attach where you desire on the arms. Once you have those secured, you then connect the arms by sliding the attachment into the desired hole of the squat rack. Once you secure it, it should be able to move up and down as a machine handle would. It certainly beats most DIY options that are out there.
You can place the sleeves and handles where you like, but I suggest placing the weight sleeves at a higher point on the lever arms than the handles. This helps make the weight feel like a greater resistance, which can offer the type of challenge you need to prosper with your training.
10 Lever Arm Exercises to Try Now
There are likely dozens of great exercises that can target everything from the shoulders to the biceps to the calves and everything in between. These 10 are among the best exercises because they are simple to set up, easy to execute, and they will make your workouts more productive. Start with these before trying to move on to more advanced movements.
There are several brands that make quality lever arms, including Rogue, Rep Fitness, and Titan Fitness. The arms you will see in the video examples are from HulkFit, and they are attached to a Fitness Reality 810 XLT squat rack.
1. Jammer Exercise
Why Do It: This is a movement that is closely associated with football players, but it can promote body control and pushing force with the entire body. Secondarily, it can help increase chest and triceps size.
How to Do It:
- Set the lever arms in a position so the handles are around the chest to upper torso area. Stand behind the handles and take a comfortable overhand or neutral grip of the handles.
- Take one step forward and explosively push the handles as far as you can. Once you reach lockout, slowly return to the starting position.
- Repeat the same motion by stepping up with the other foot. Return to the starting position. Repeat for the desired reps.
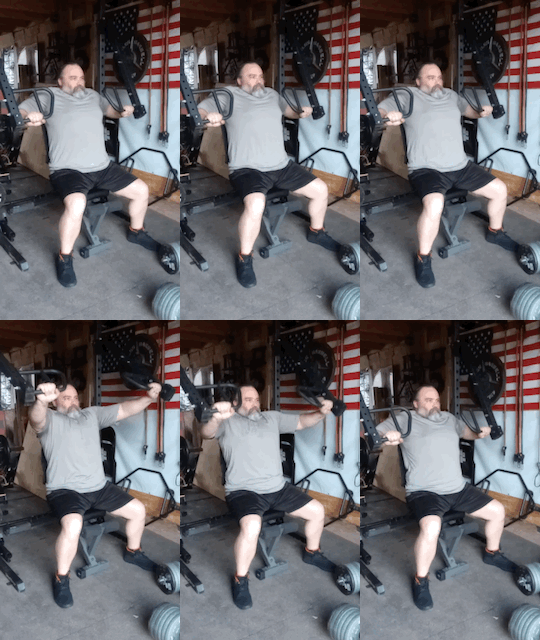
2. Seated Chest Press
Why Do It: Lifters who have trouble with the flat bench press or want another movement to target the chest will like this one. This version of a seated chest press machine will help promote chest development because the upper body is upright and the press is a horizontal movement, which is more natural for the pecs and shoulders.
RELATED: Best Weight Bench
How to Do It:
- Set an adjustable bench in the middle of the rack between the lever arms. Set the lever arms so you can sit on the bench with the handles at chest height.
- Take a comfortable overhand or neutral grip of the handles. Using your chest muscles, press the handles out as far as you can. Contract your pecs at the top of the rep.
- Slowly return the handles to the starting position and repeat. Perform the desired reps before slowly moving your hands and allowing the handles to go back to their original positions.
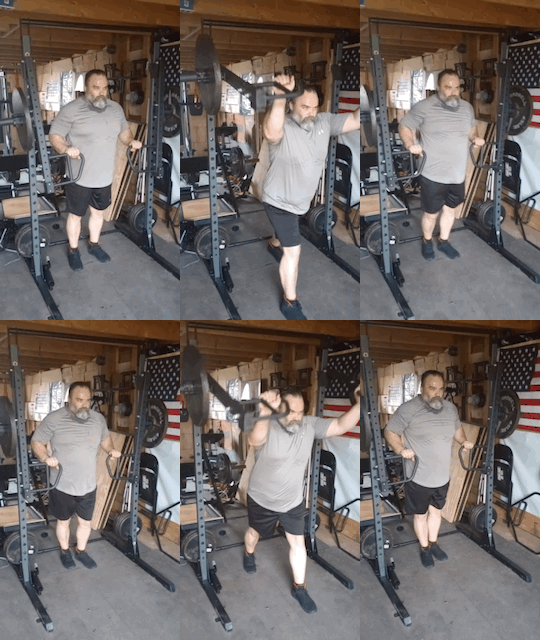
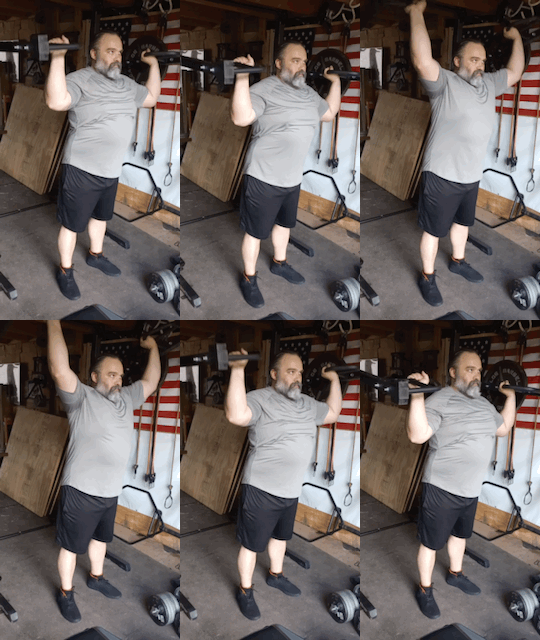
3. Viking Press (Standing Shoulder Press)
Why Do It: Doing a standing press can help improve core strength as well as shoulder development. Using the lever arms can be easier on the shoulder joints and rotator cuffs than if you were using a barbell. Each side has to work independently, which can help correct possible imbalances.
How to Do It:
- Set the top of the lever arms at around shoulder height. Step in between the lever arms and take a proper grip of the handles. Lift them up so the handles are in your hands at shoulder height. Stand tall with your feet approximately shoulder-width apart.
- Press the handles up as high as you can until your arms are straight overhead. Slowly lower the handles to the starting position. Repeat for the desired reps.
- You can bend your knees to generate extra force if necessary. You can also perform a seated shoulder press by setting an adjustable bench in front of your rack.
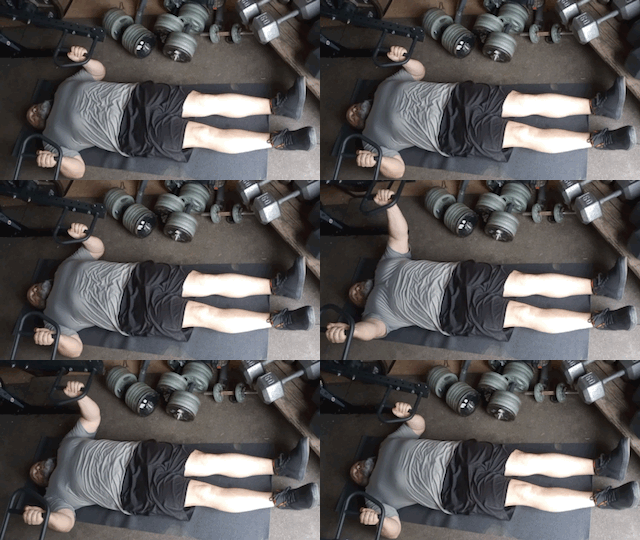
4. Floor Press
Why Do It: The floor press is an accessory movement that many powerlifters have used to help improve the lockout of the bench press. It can also be a big movement to target the triceps because they bear the brunt of the load during the top half of the exercise.
RELATED: Best Triceps Workouts
How to Do It:
- Set the lever arms up so the handles can reach the floor. Lie in between the handles and take a solid neutral or overhand grip. Your hands should be around the chest area, similar to a chest press. Your upper arms should be on the floor.
- Place your legs either straight out in front of you or bent so your feet are flat on the floor, whichever is more comfortable for you.
- Press the handles up until your arms are straight. Contract your chest and flex your triceps hard at the top. Slowly return to the starting position and repeat for the desired number of reps. A wider grip will focus more on the chest while a closer grip will target the triceps more effectively.
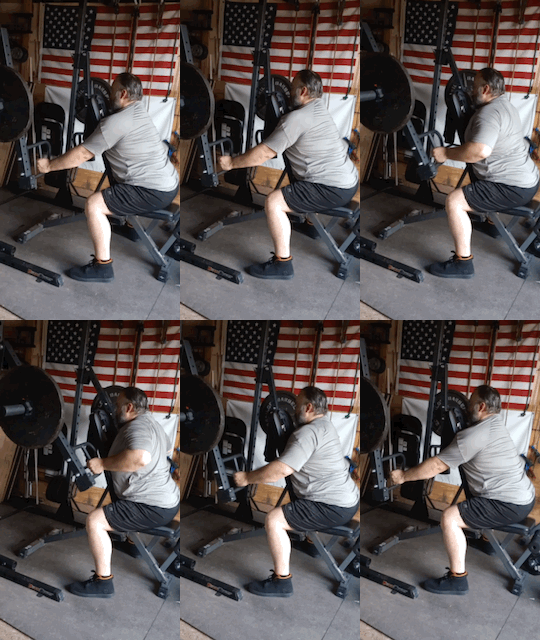
5. Seated Row
Why Do It: This movement can be similar to an advanced seated row machine that you find in many commercial gyms. You can set the arms to target the upper back or the lower lats, depending on where the handles are while you’re sitting on a bench. Imagine having a plate-loaded back machine in your home gym! This can also be a bent over row alternative that’s easier on your lower back.
RELATED: How to Do a Seated Cable Row
How to Do It:
- Set your lever arms at around chest height so the handles are low. Sit on an adjustable bench with your chest on the pad. You should have to reach to grab the handles with your desired grip. Place your feet flat on the floor and keep your butt on the seat.
- Pull the handles in as far as you can while contracting the muscles in your back. Once you squeeze the muscles in your upper back, slowly lower the handles to the starting position.
- Repeat for the desired reps. You can use multiple grips to target different areas of the back. A high overhand grip will hit more of the rear delts, rhomboids, and mid-traps, while a lower neutral grip will benefit the lats.
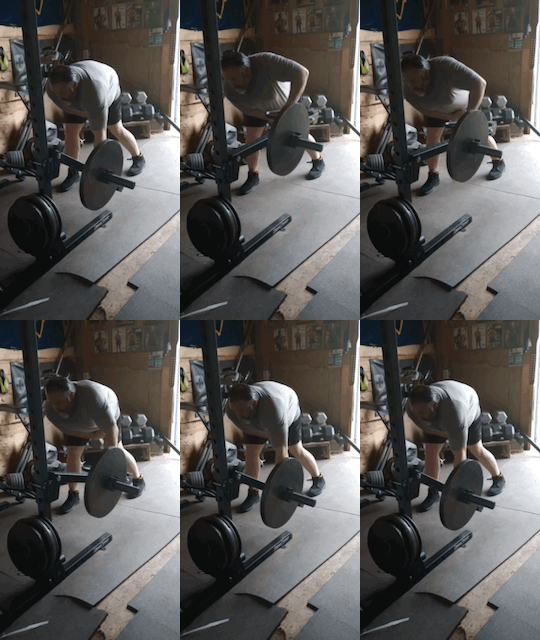
6. One-Arm Row
Why Do It: The lever arms work unilaterally, so you can either do a single-arm version of the previous row exercise, or you can do a one-arm row with more weight than you have in dumbbells because the lever arms can hold plates. This is almost like using a landmine, and it can be a game changer for upper back strength.
How to Do It:
- Set the lever arms up so the handles can reach the floor. Bend over at the hips to take a grip of the handle for the side you wish to work.
- Take a grip of either handle with the appropriate hand. Place the opposite foot out in front of you. (If you grab with the left hand, stick your right foot out.) Place your non-working arm across your bent leg for extra balance.
- Keep your back as neutral as possible and perform a rowing motion as you would with a dumbbell. Once you’ve pulled as high as possible, lower to the starting position and repeat.
- Repeat for the desired reps and switch arms to work the opposite side.
7. Squat
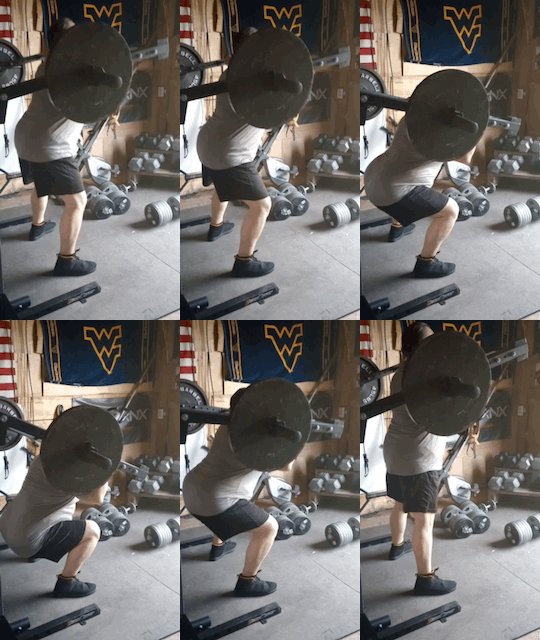
Why Do It: Having a barbell on your back isn’t necessary to develop the thighs. Doing a machine version of the squat allows you to target the quadriceps and glutes without all the pressure of the barbell on your shoulders. The pivot points of the lever arms can also help you maintain control of the weight.
RELATED: Benefits of Squats
How to Do It:
- Set the lever arms up around waist height. You should be able to perform a full squat motion with the handles without touching the floor.
- Take a handle in each hand and lift the arms up to shoulder height. Stand with your feet shoulder-width apart or wider.
- Perform a squat as deep as you can while following barbell safety or until your thighs are parallel with the floor. Push through your feet to return to the standing position. Keep your back as neutral as possible and look straight ahead while doing this.
- Repeat for the desired reps.
8. Deadlift
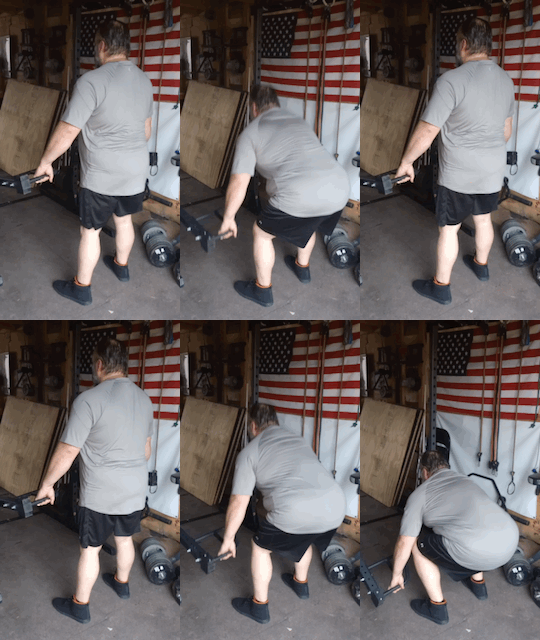
Why Do It: The machine deadlift is a great barbell deadlift alternative that can allow you to perform the movement in a way that you feel it best. If your lever arms have multiple handles, you can use whatever grip you find to be most comfortable. If you have vertical handles, it can be similar to a machine version of a hex bar deadlift. You also won’t feel the entire weight of the plates on your back and shoulders because of the lever arms. Furthermore, you can stand with the weight in front of you or behind you.
How to Do It:
- Set the lever arms up so the handles can reach the floor. Stand in between them facing whichever way you like, and take a handle in each hand.
- Perform a deadlift motion by standing tall with the handles. Lock out your hips and straighten your upper back at the top.
- Slowly return to the starting position and repeat for the desired reps.
9. Single-Leg Deadlift
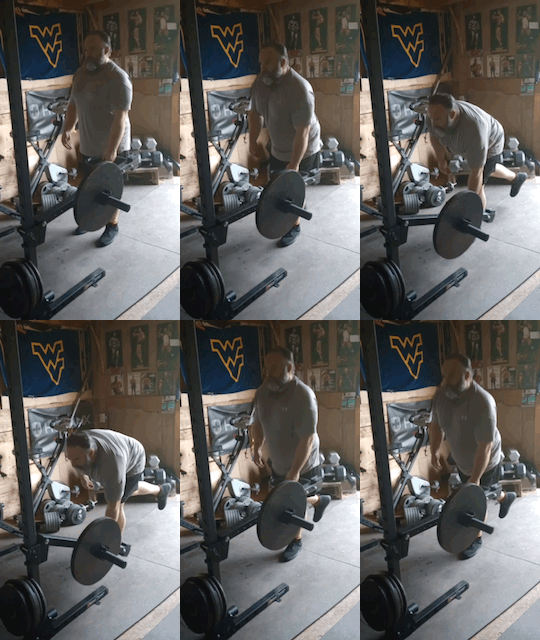
Why Do It: You can isolate each hamstring and promote balance with the lower half of the posterior chain. You can stand in the middle and use both lever arms or work with one at a time.
How to Do It:
- Set the lever arms up so the handles can reach the floor.
- Bend at the hips to take a grip of the handle for the side you wish to work. Take a grip of either handle with the appropriate hand. Place the opposite foot behind you by sticking it straight out or bending your knee. (If you grab with the left hand, lift your right foot.)
- Slowly push your hips back and lower the handle as far as you safely can to the floor. Return to the starting position by contracting your glute and hamstring. Once you’re standing again, this is one rep.
- Repeat for the desired reps and switch sides so you can work the other leg in the same manner.
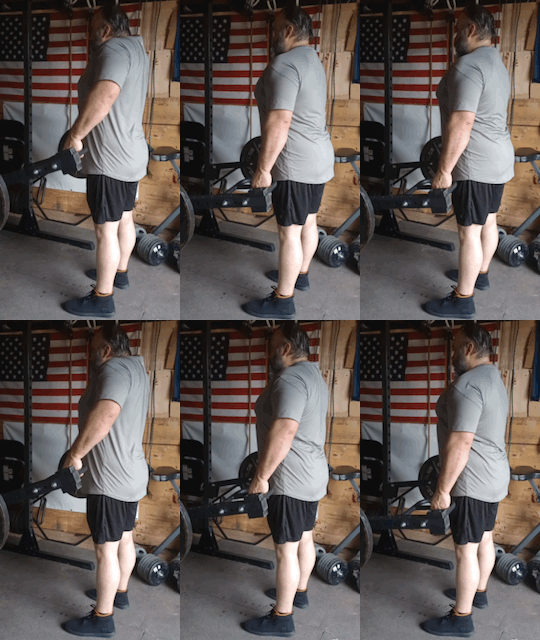
10. Machine Shrug
Why Do It: You do this because big traps are great. Well, for some of us. For everyone, healthy and strong traps can help with pulling, rowing, and developing the upper back and shoulders. To be clear though, most guys do it because they want big traps.
How to Do It:
- Set the lever arms so the handles reach the floor. Stand in between the arms and grab a handle in each hand.
- Stand up with the handles in your hands and arms by your sides. The weight should not reach the floor from this position.
- Lift your shoulders up toward your ears and contract your traps. You can bend your elbows slightly, but you shouldn’t pull them up too high. Hold this position for a solid contraction before lowering them to the starting position.
- Repeat for the desired reps.
Lever Arm Exercises: FAQs
What are lever arms?
Lever arms are also called jammer arms. They are rack attachments that can fit on a squat rack for the purpose of adding machine-type exercises to your home gym workout programs. These arms fit inside the hole of the rack, are attached by a pin, and they pivot so you can perform exercises in a variety of angles.
What are the best lever arm exercises?
One of the most popular exercises is the jammer movement itself, which can be a great push movement for the entire body. Other lever arm exercises include the standing overhead press, seated chest press, deadlift, and bent-over rows, among others.
What muscles do jammer arms work?
That is determined by where you position the jammer arms on the rack. You can train every major muscle group in the body with jammer arms. The handles are great for upper-body exercises, and there are even some attachments you can purchase that make them work similarly to the leg press for the lower body.


